
Retaking Pelargir Guide
(by Sibba & Miofli)

Start
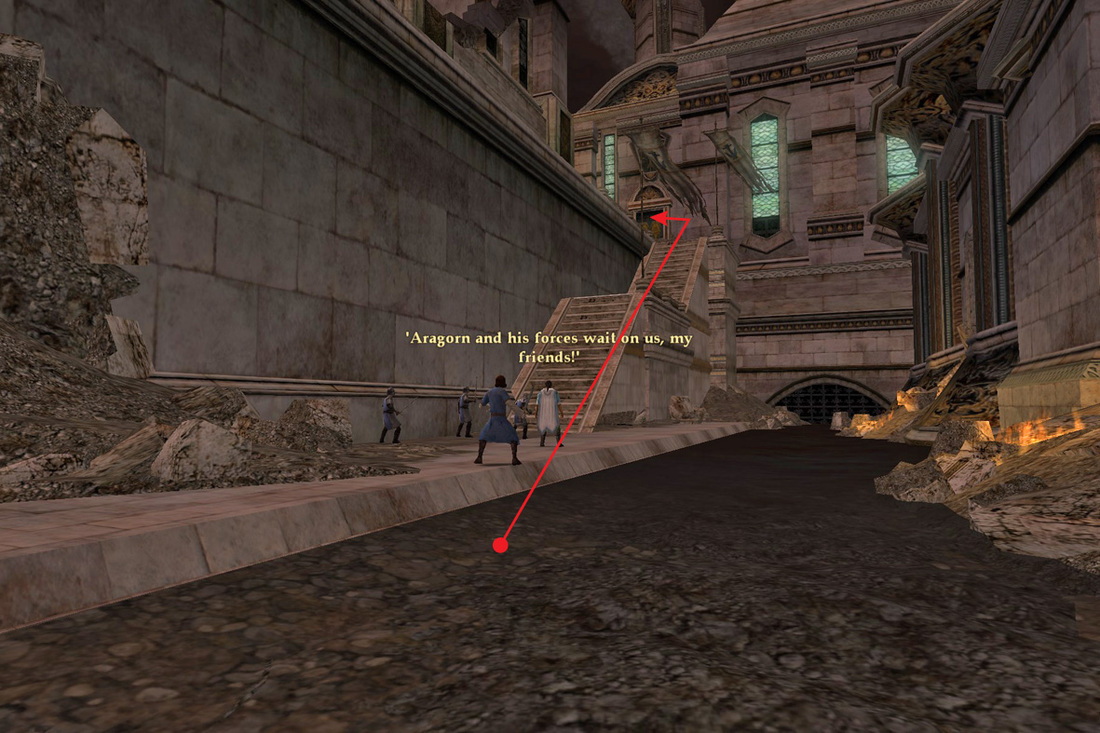
This is the starting point. We travel in the instance, eat, drink and allow some time to the appointed officer of the fellowship to issue orders to the captain.
Stage #1
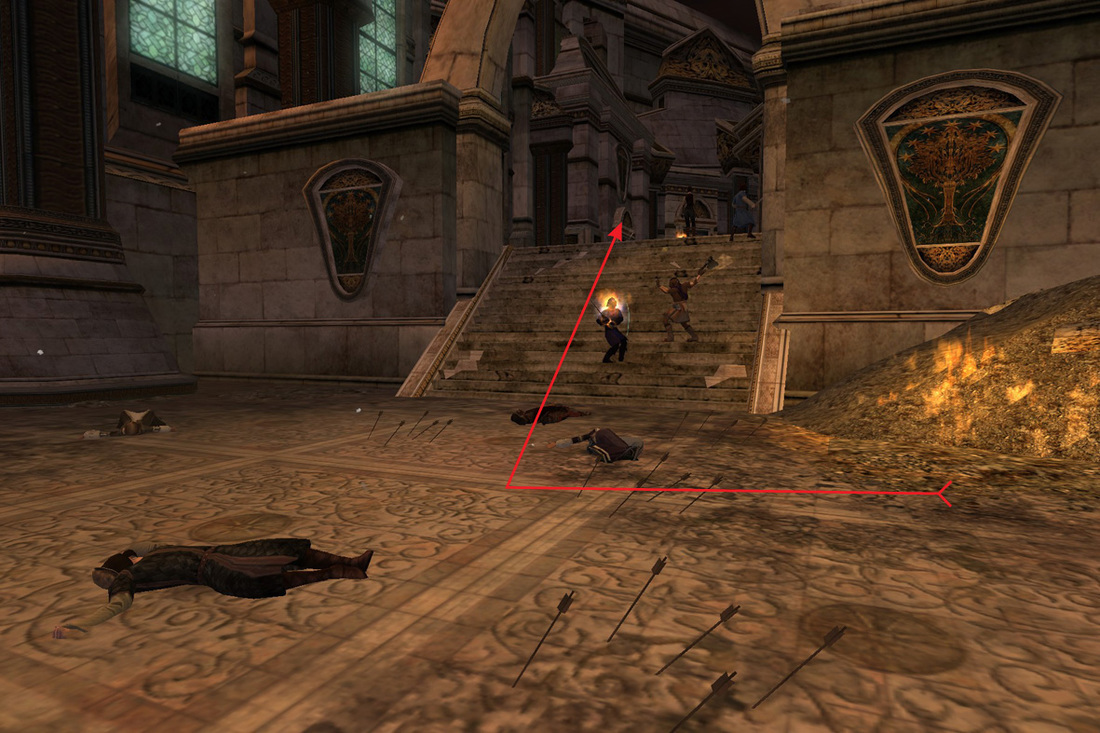
At this point the first - fairly easy- fight takes place.
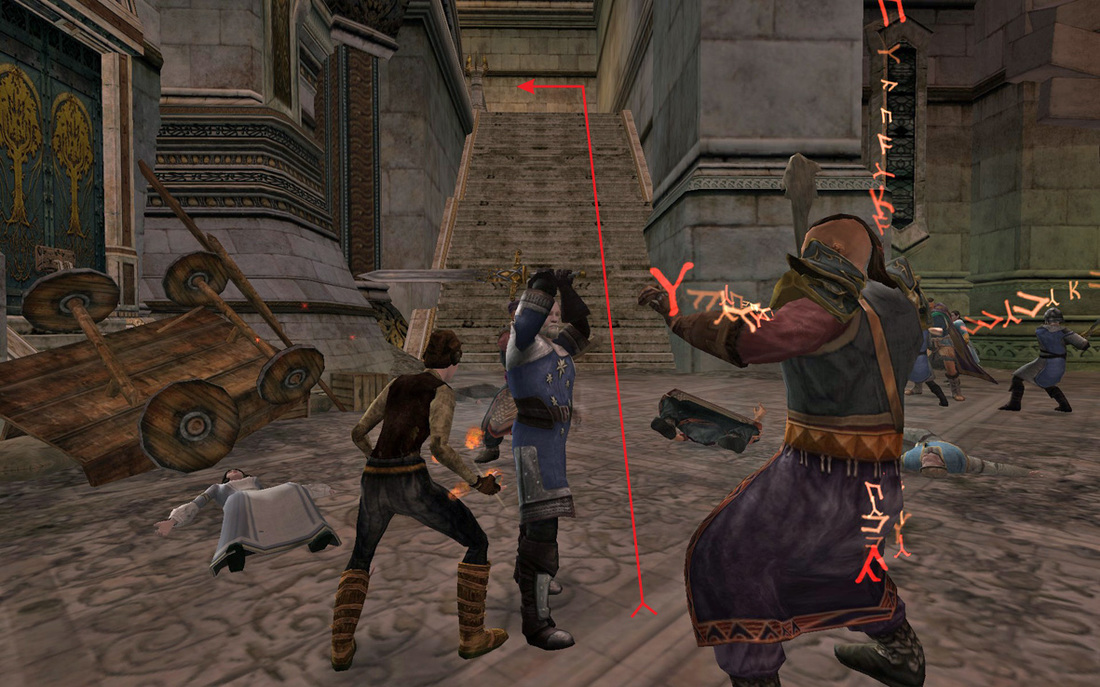
Here the second -equally easy to the first- fight takes place.
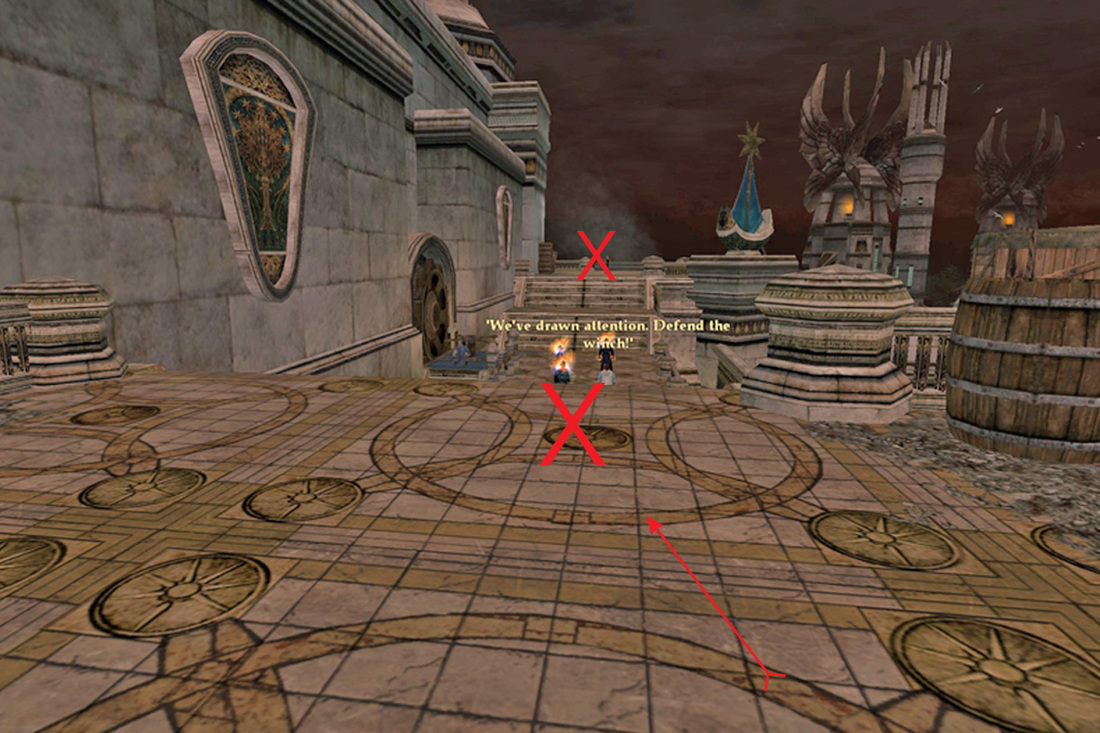
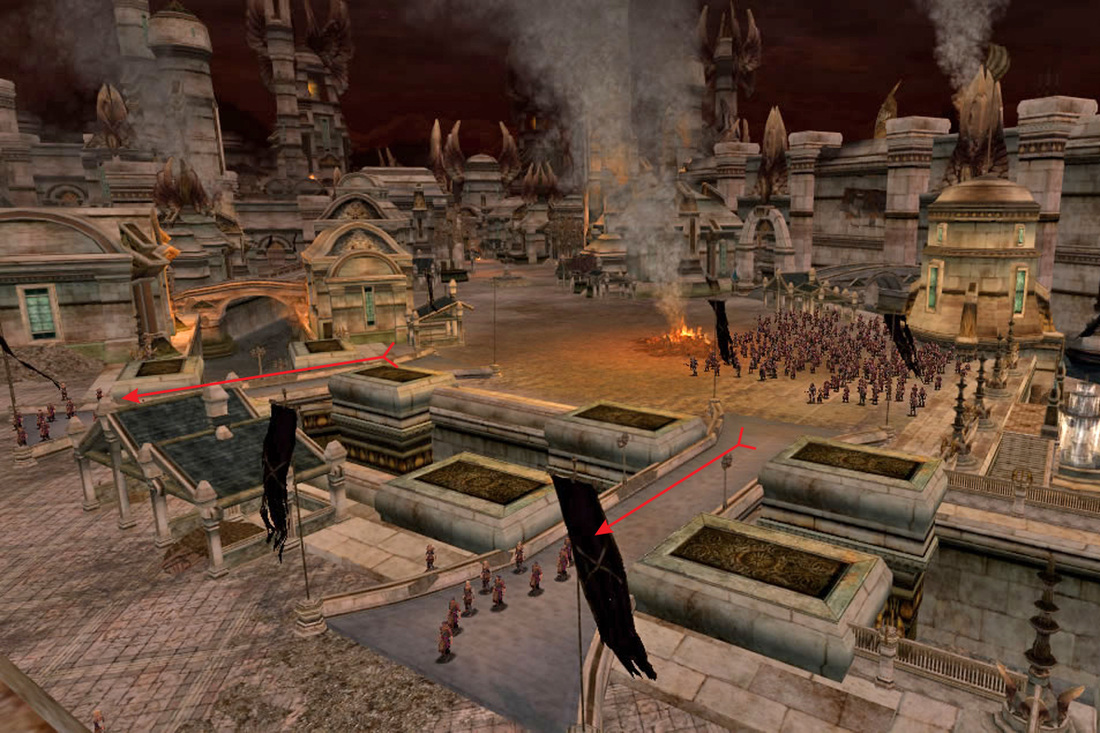
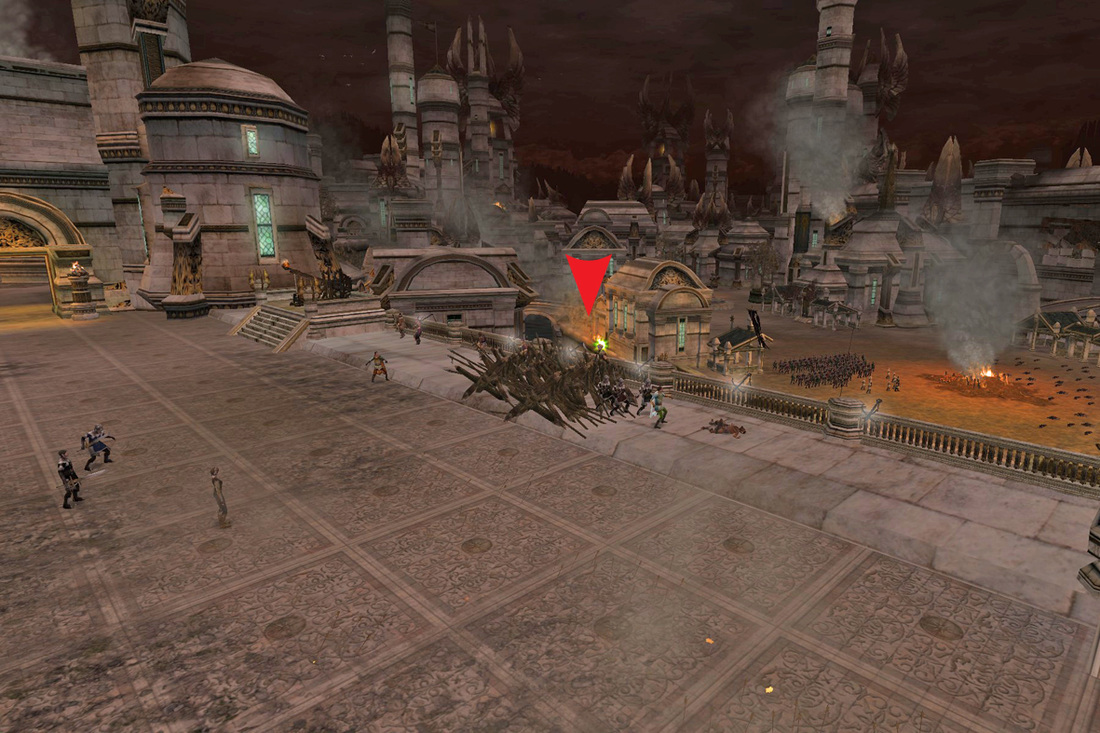
At this point the fellowship has reached the Gate Winch. The team splits in half and stands at the marked spots, so as to take advantage of the friendly NPC soldiers.
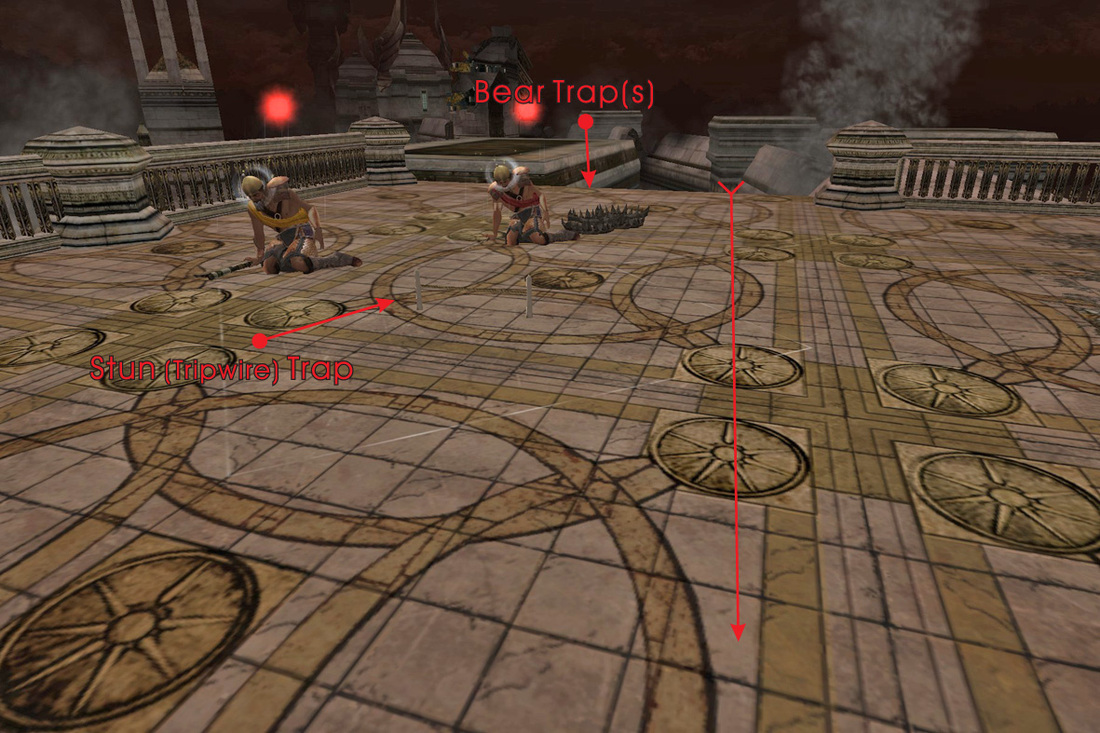
At this point we use one or more Bear Traps and one Tripwire Trap only! We place the traps so, that the mobs first step on the Bear Traps (and receive damage from them) and then get stunned by stepping on the Tripwire Traps. This way it is easier to take them down before they reach the Winch.

When merit is awarded, this Stage ends and the fellowship moves to Stage #2
Stage #2

Here the fellowship regroups and it should allow some time to the officer to issue orders to the captain.
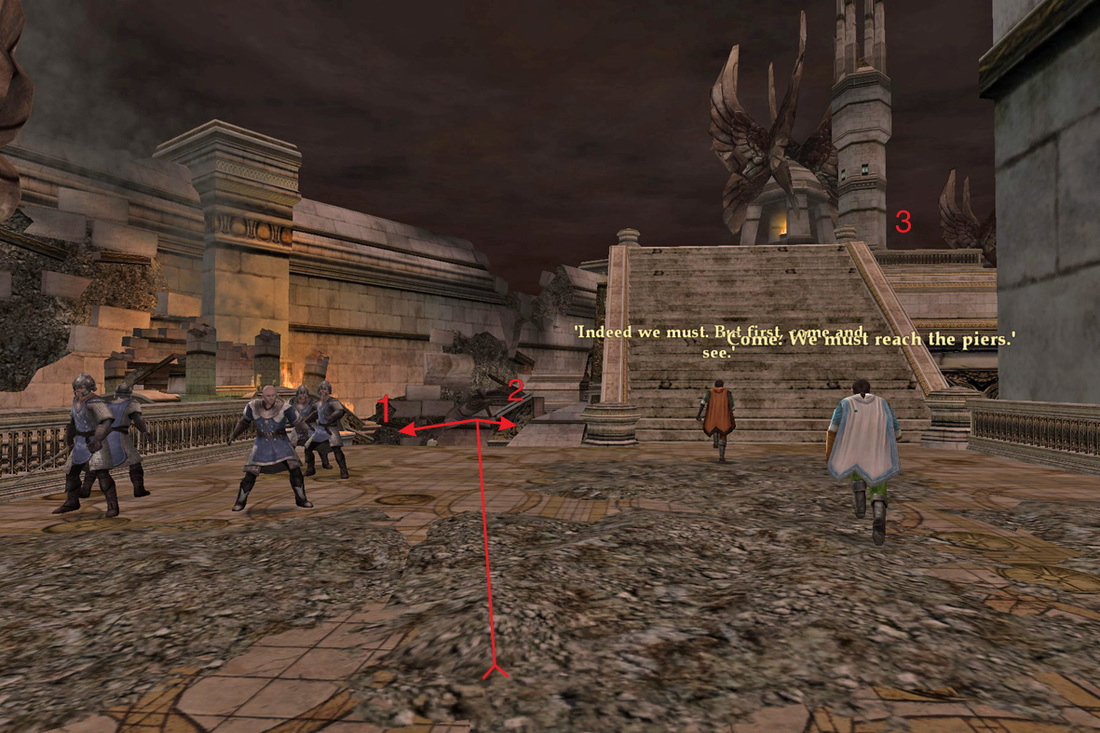
We move forward, placing first Bear Traps and 1 barricade to the Back Door (1) (Only for 6man) and then we set up the other 3 barricades (for details keep reading). We keep placing Bear Traps at the Back Door as soon as the cooldown allows it for the whole duration of this Stage. We don't build the Ballista (3) yet!
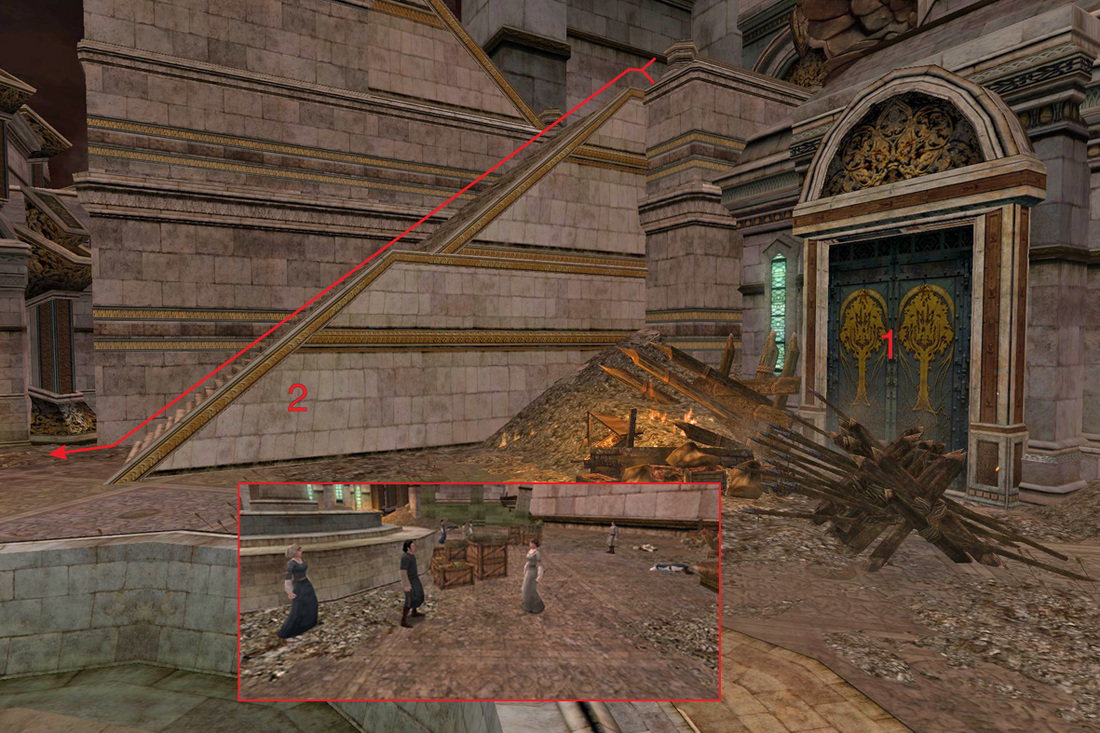
(1) Back Door
(2) Mobs come from the stairs that sometimes may hit the supplies, so we have to keep an eye on the supplies and the citizens of the area (loss of one or another costs merit)
(2) Mobs come from the stairs that sometimes may hit the supplies, so we have to keep an eye on the supplies and the citizens of the area (loss of one or another costs merit)
We place the barricades at spot (1), (2) and (3)
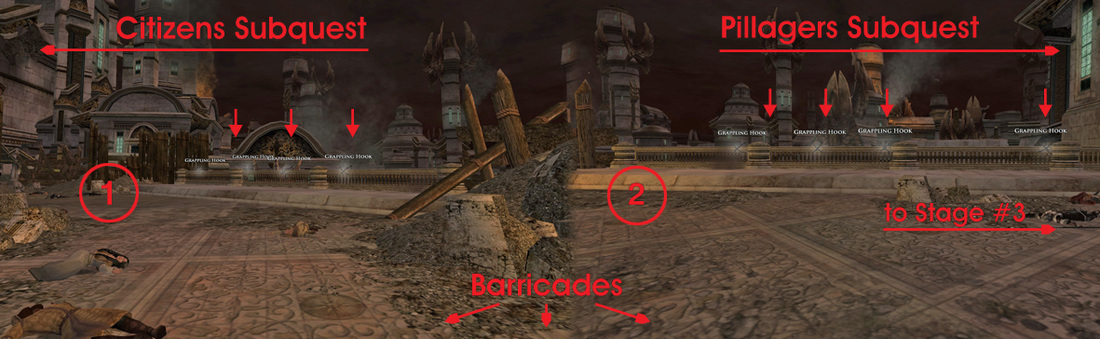
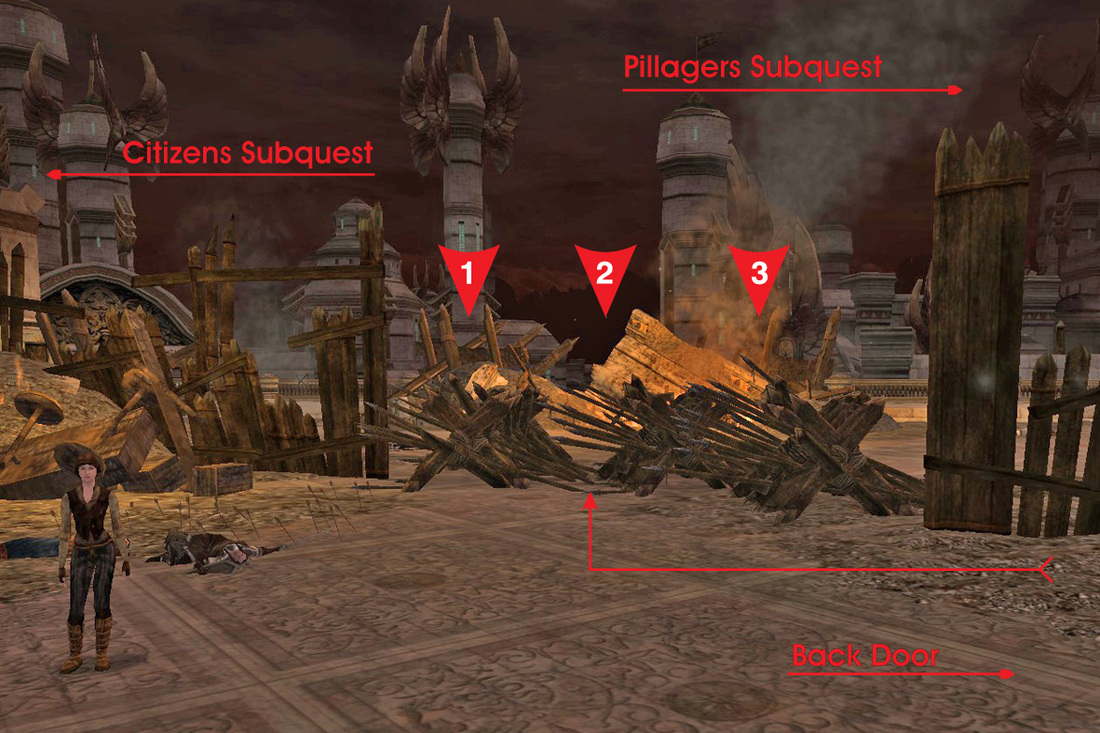
As soon as we get one of the two possible sidequests:
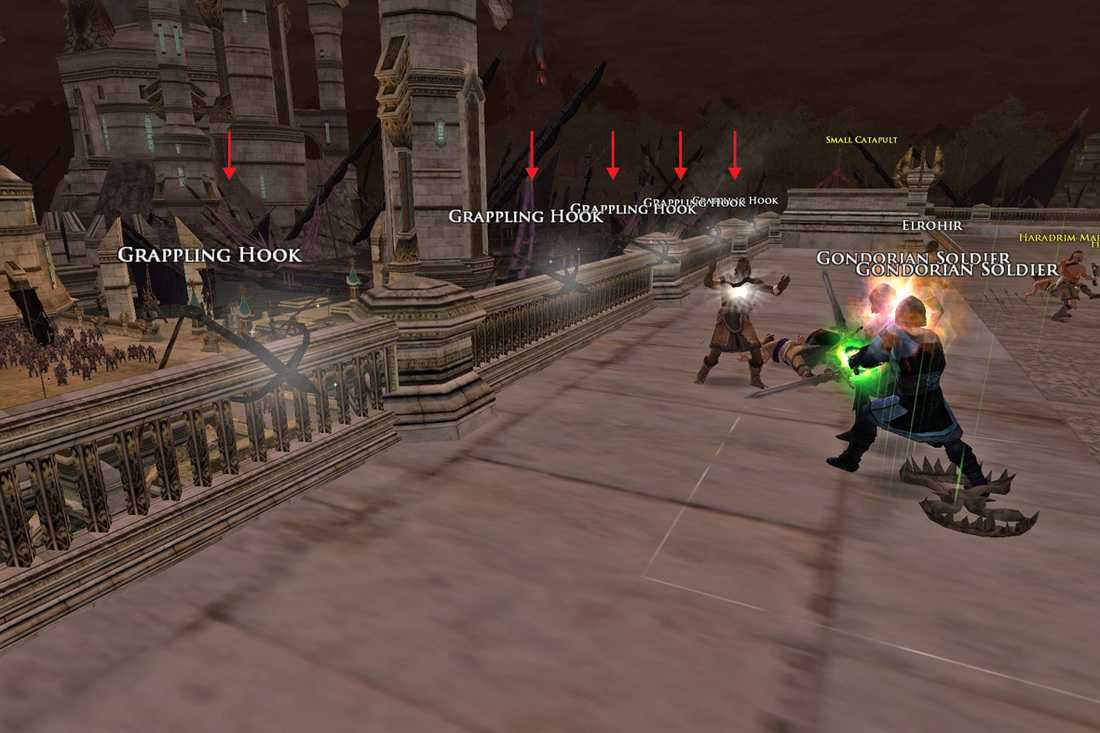
One or two members of the fellowship move to get the sidequests completed and the rest of fellowship cuts hooks until the sidequest is done so as to delay the appearance of the boss.
After the sidequest, the first of the two bosses of this stage appears on either spot (1) or (2). The fist boss must be taken down within 45 seconds.
- Backs to the Wall (Citizens), spot (5) at mini guide map
- Parade of Thives (Pillagers), spot (6) at mini quide map
One or two members of the fellowship move to get the sidequests completed and the rest of fellowship cuts hooks until the sidequest is done so as to delay the appearance of the boss.
After the sidequest, the first of the two bosses of this stage appears on either spot (1) or (2). The fist boss must be taken down within 45 seconds.
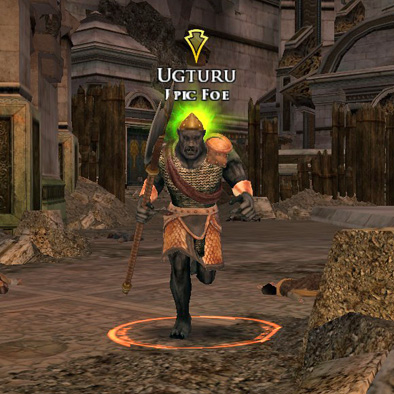
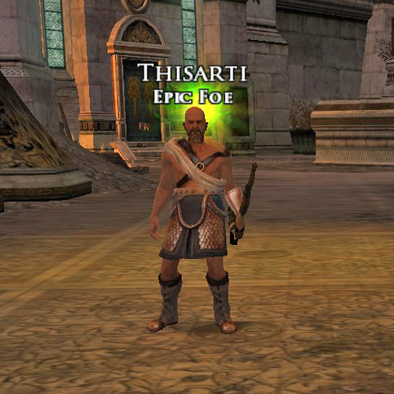
Ugturu the Half Troll appears at spot (1)
|
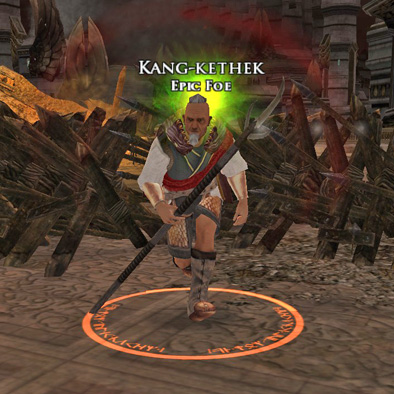
Kang-kethek the Sorcerer appears at spot (2)
|
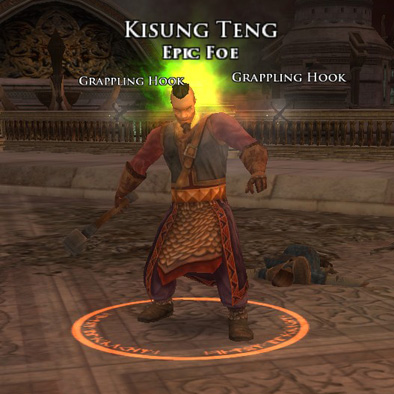
At the end of this phase, Kisung Teng will join in the attack. Spot (2)
|
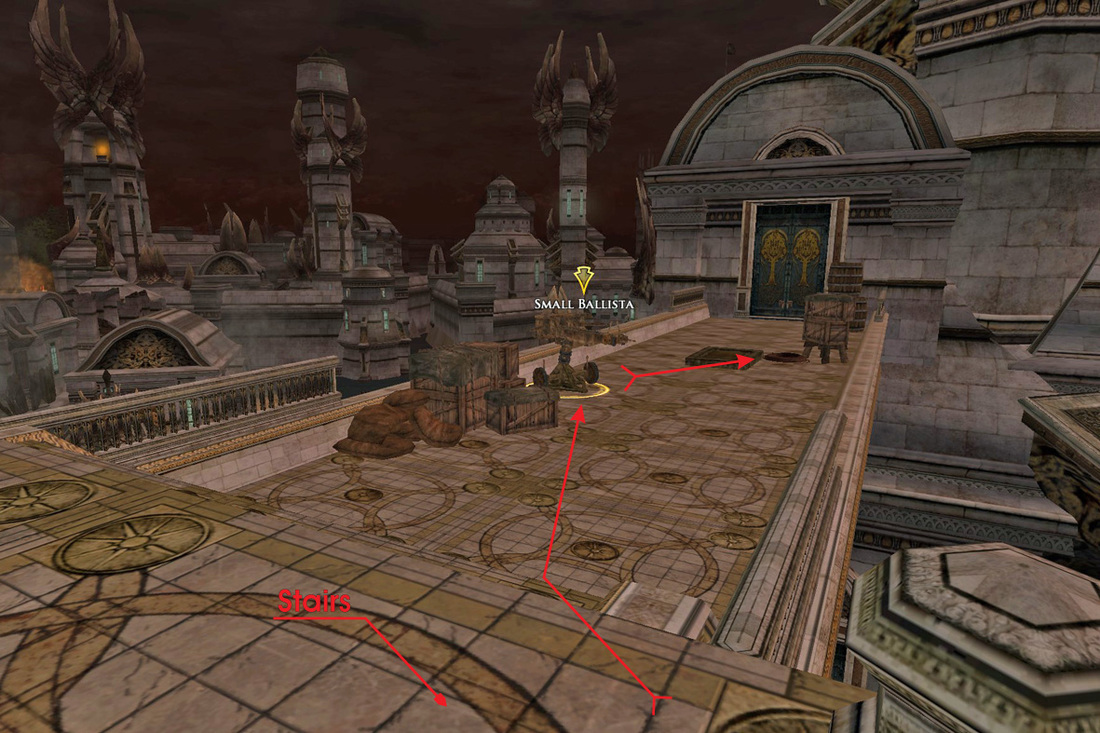
As soon as both the bosses are down, one member of the fellowship goes up and builds the ballista (Only for 6man). The ballista is built at this point so that there is no way to be destroyed by the mobs. The rest of the fellowship takes the barricades and regroups at the gate for the last phase of the instance.
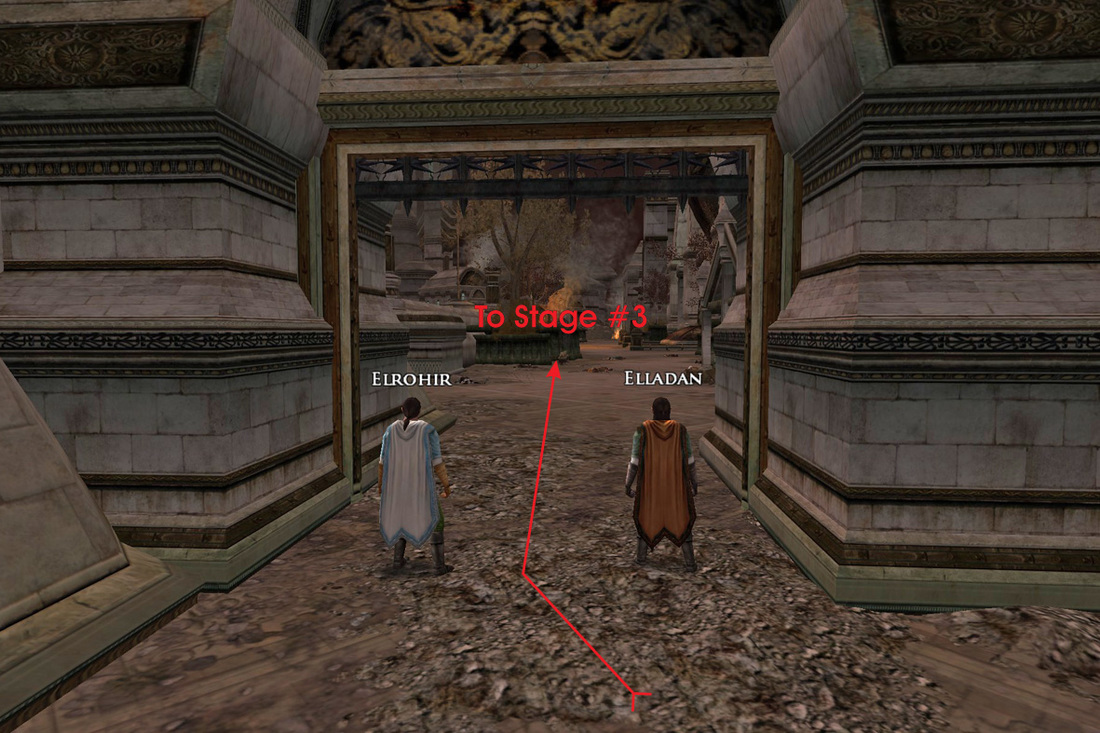
When Stage #2 is complete the fellowship regroups at the gate and allows time to the officer of the fellowship to go ahead and order the NPCs.
Stage #3
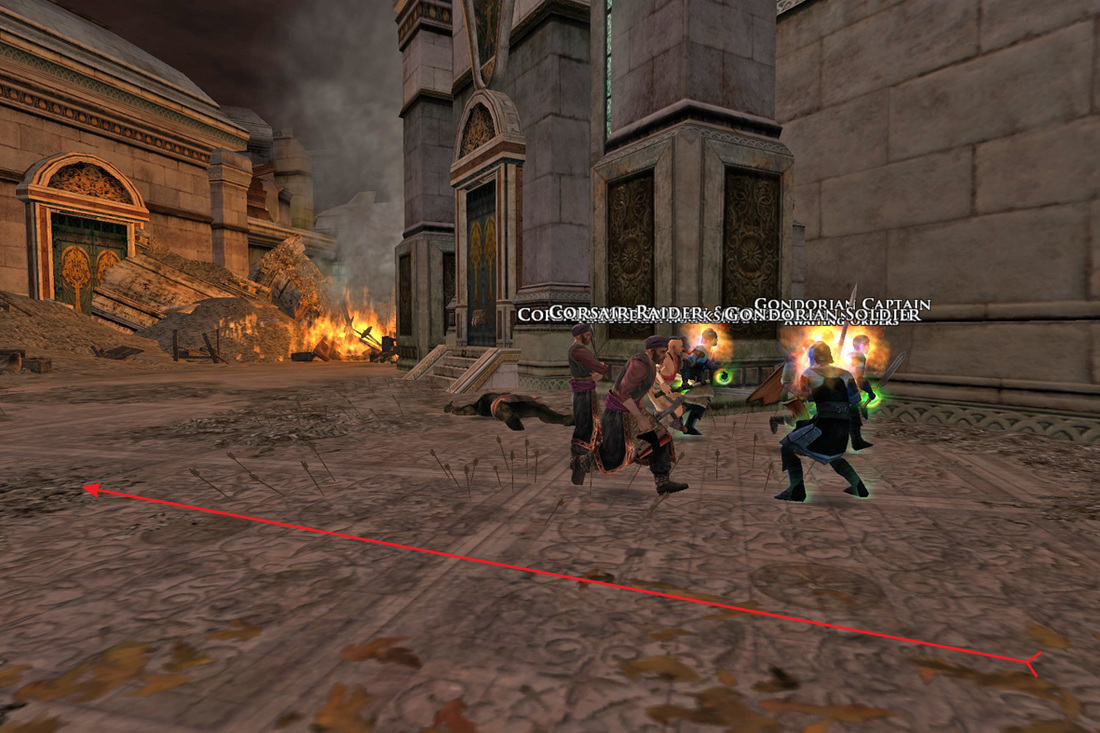
The NPCs can easily take down the first group of mobs so the fellowship doesn't need to bother with them.
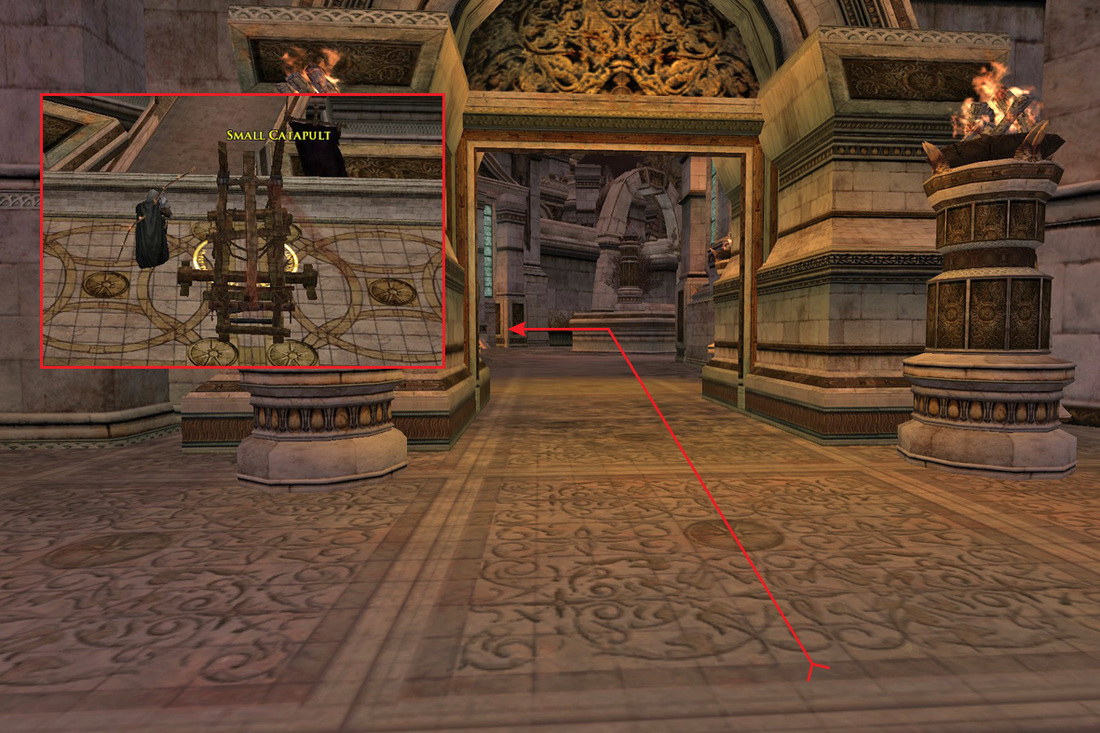
This way the fellowship gets easier to the main area of Stage #3. Here the fellowship builds and upgrades (armor and speed) the 2 catapults. We do not place the barricades yet (because at this point they are useless plus, if we do place them sooner than we must, they keep getting attacked by the mobs and we have to constantly repair them).
We take one or two shots with the catapults until we get one of the two possible sidequests (Only for 6man) :
- The Ship Slaves, spot (12) at mini guide map (it requires two people to get this quest done. One goes for the slave and the other takes down the mobs. Due to a bug, we have to free all the slaves and keep at least one mob alive to get the quest completed)
- The Thrich Blowh Horn, spot (13) at mini guide map (A rather simple quest, can usually be done by one player)
As long as the sidequest is active, the rest of the fellowship takes down hooks.
After the sidequest is done, one out of two possible bosses appears randomly at spots (10) or (11) of the mini guide map. The boss must be taken down within 45 sec
After the sidequest is done, one out of two possible bosses appears randomly at spots (10) or (11) of the mini guide map. The boss must be taken down within 45 sec
|
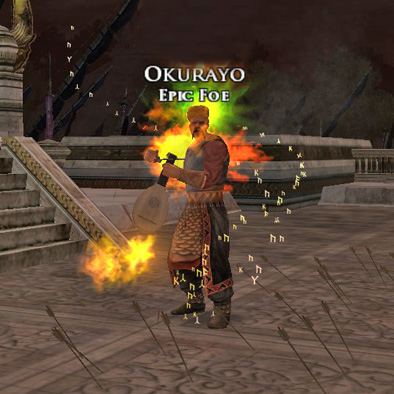
Okurayo the Minstrel, spot (11) at the mini guide map
|
Now we can build the barricades at the center and wait for Zagaroth, the last boss of the instance. When he is taken down the Epic Battle ends.
That was it! Pelargir is free again, until next time!

